Wired Condenser Conference Mic Setup for Clear Meetings
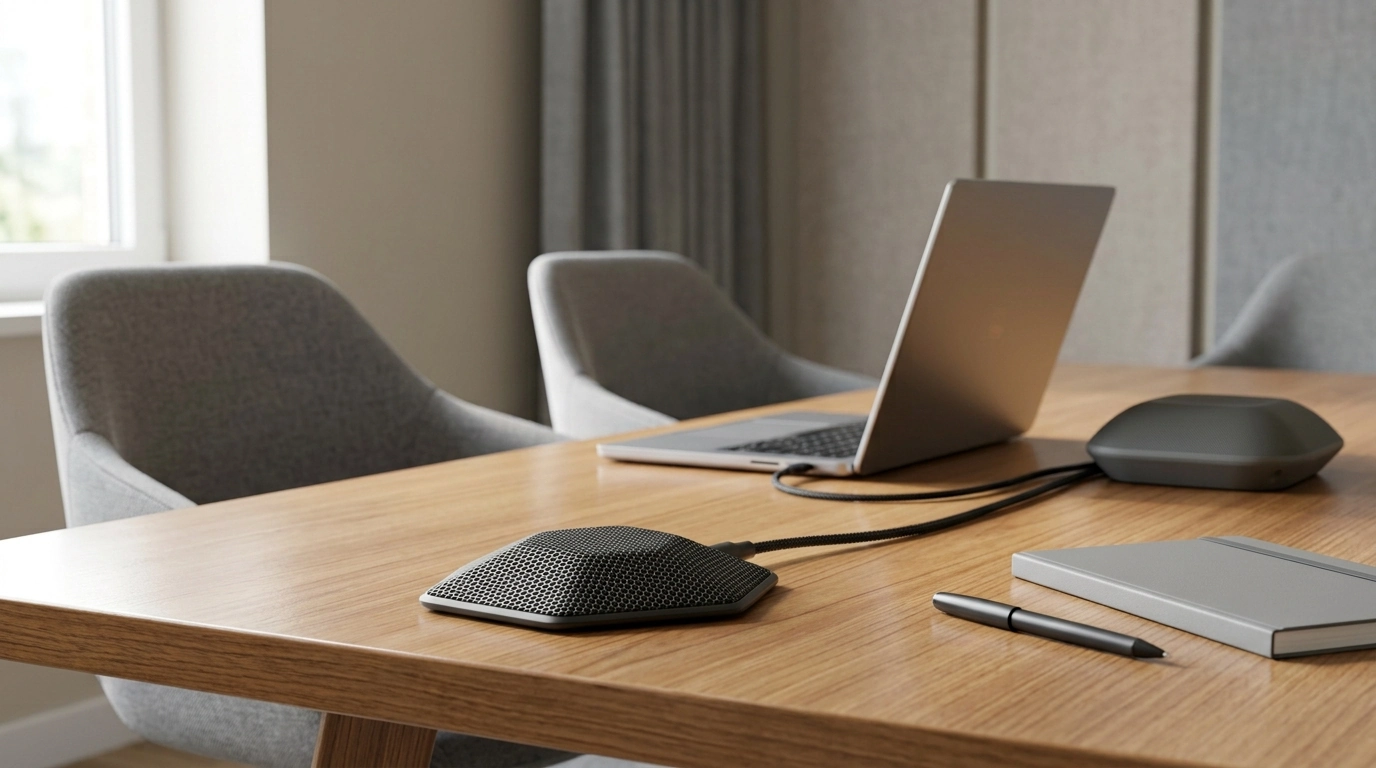
Professional Wired Condenser Conference Microphone for Clear Meeting Audio
Reliable speech pickup can make remote calls, team huddles, and training sessions easier to follow. A wired condenser conference microphone is designed to capture voices with clarity while keeping setup simple—plug in, position it well, and focus on the conversation. For teams that are tired of “Can you repeat that?” moments, a table-based mic can be one of the quickest upgrades to day-to-day communication. For more guidance, see Microphones – SAIC Media Resources.
What This Microphone Is Best For
A wired condenser conference microphone is a practical fit when the priority is clear voice pickup without complicated mixing gear. Common use cases include: For further reading, see Conference Microphones- Event Technology.
- Conference rooms and small meeting spaces needing clearer speech than a built-in laptop mic
- Video calls for work, tutoring, and remote interviews where consistent volume matters
- Webinars and online classes where voice intelligibility is more important than room ambience
- Basic voice recording for notes, dictation, and presentations
If you’re equipping a small office, consider pairing a dedicated mic with a reliable power source for laptops and phones used on calls—especially in shared rooms where chargers “walk away.”
How a Wired Condenser Conference Mic Improves Clarity
Conference audio often falls apart because of inconsistent distance, room reflections, and unstable connections. A wired condenser mic helps address the most common causes of muddy or low-volume speech:
- Condenser capsules are sensitive, helping pick up speech detail and articulation, which makes names, numbers, and technical terms easier to understand.
- A wired connection stays dependable and avoids battery downtime, pairing delays, and many of the dropouts associated with wireless audio.
- Stable placement on a table helps keep a more consistent distance to speakers compared with holding a phone or shifting a laptop around.
- More consistent signal can reduce the need to repeat yourself or raise your voice, which is especially helpful for long meetings and training sessions.
For a quick refresher on how microphones capture sound and why placement matters, Shure’s overview is a helpful primer: Shure Audio Education: Microphone Basics.
Quick Setup Checklist
A few small tweaks before the call starts can prevent most complaints (echo, low volume, or “roomy” sound). Use this short checklist:
- Place the microphone on a stable surface away from keyboard clatter and mouse clicks.
- Keep it centered to the group when possible; face it toward the primary speaker area.
- Lower speaker volume to reduce echo, and enable echo cancellation in the calling app when available.
- Do a 10-second test call to confirm levels before the meeting starts.
If you’re using Teams or Zoom, the built-in audio processing can help when enabled and configured correctly. Official help pages are worth bookmarking: Microsoft Support: Reduce echo and noise in Teams meetings and Zoom Support: Audio settings and troubleshooting.
Placement Tips for Different Rooms
Even a good microphone can sound “far away” if it’s placed poorly. Start with these room-by-room guidelines:
- Small office (1–3 people): position near the middle of the desk, about 12–24 inches from the main speaker.
- Huddle room (3–6 people): place centrally; ask side speakers to lean in slightly for key points or rotate who sits closest when presenting.
- Training room: keep the mic closer to the presenter; minimizing distance reduces room reverb and improves clarity for remote attendees.
- Noisy spaces: move away from HVAC vents and windows; soft furnishings (curtains, a rug, fabric chairs) can reduce harsh reflections.
Common issues and quick fixes
| Issue | Likely cause | Fix |
|---|---|---|
| Echo heard by others | Speakers too loud or mic too close to speakers | Lower speaker volume, move mic farther from speakers, enable echo cancellation |
| Voice sounds distant | Mic too far from speakers | Move mic closer, keep it centered, reduce room noise |
| Hollow/roomy sound | Hard surfaces causing reflections | Add soft materials (curtains, rug), move away from walls |
| Buzz or hum | Poor cable routing or electrical interference | Route cable away from power bricks, try another port, keep cable untangled |
What to Look For When Buying a Conference Microphone
When you’re comparing conference mics, the best choice is usually the one that fits your room, your platform, and your day-to-day workflow. Key factors to check:
Professional Wired Condenser Conference Microphone: At-a-Glance
Product details
| Item | Details |
|---|---|
| Product | Professional Wired Condenser Conference Microphone |
| Price | 16.51 USD |
| Availability | In stock |
| Product page | https://unrivaledelectronics.shop/professional-wired-condensder-conference-microphone/ |
- 120W Fast Charging Power Bank 50000mAh for Samsung for keeping devices topped up during long meetings.
- Mastering Perplexity AI: A Friendly Guide to Smarter AI Conversations for learning efficient ways to research and summarize meeting follow-ups.
- Use AI to Become Better | Self-Improvement Guide for improving planning, routines, and consistent execution across projects.
Care and Maintenance
FAQ
Is a wired conference microphone better than a wireless option for meetings?
Wired mics are often more reliable because there’s no battery to manage and fewer chances of interference or dropouts. Wireless can still be a good fit when cable runs are impractical or when you need a cleaner table setup.
Where should a conference microphone be placed on a table?
Place it on a stable surface near the center of the group and keep it roughly 12–24 inches from the main speaker when possible. Keep it away from loudspeakers, typing areas, and vents to reduce echo and background noise.
Why do people hear echo when using a conference microphone?
Echo usually happens when the mic picks up audio from the room speakers, creating a feedback loop. Lower the speaker volume, increase the distance between mic and speakers, and enable echo cancellation in your meeting app.



Leave a comment